Introduction
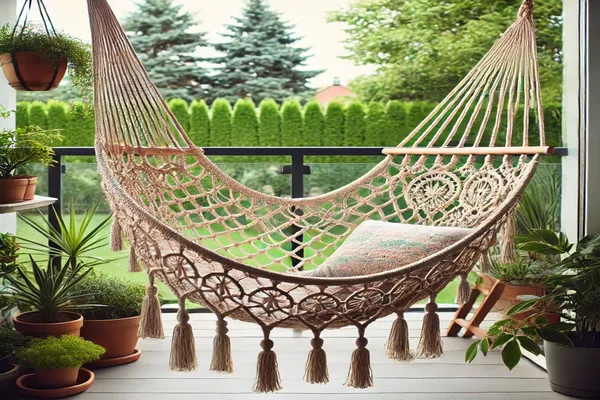
Macramé, an ancient art of knotting, has been experiencing a resurgence in popularity in recent years. From home decor to fashion accessories, this versatile technique has captivated the hearts of DIY enthusiasts and professional artisans alike. One of the latest trends to emerge from this revival is the use of macramé in outdoor projects, particularly for creating beautiful and functional backyard spaces.
In this article, we will explore how to create elegant macramé tents that provide not only shade but also a unique aesthetic touch to your backyard. These handmade tents bring a bohemian vibe and a sense of warmth to any outdoor setting, making them perfect for garden parties, relaxing retreats, or simply enjoying a sunny day. Whether you’re a seasoned macramé artist or a beginner looking to try your hand at something new, this guide will walk you through the process of crafting your own macramé tent.
If you’re ready to transform your outdoor space with a touch of handcrafted elegance, keep reading for a comprehensive macramétenttutorial that will guide you step-by-step through the creation of your very own macramé tent.
What Are Macramé Tents?
Definition and Origin
Macramé tents are handcrafted shelters created using the macramé technique, which involves knotting cords in various patterns to form intricate designs. This art form dates back centuries, with roots in ancient civilizations, including the Babylonians and Assyrians. Over time, macramé has evolved, becoming popular in different cultures and adapting to modern aesthetics. Today, it is widely appreciated for its beauty and the unique, personal touch it brings to handmade items.
Aesthetic Benefits
The use of macramé for creating tents offers a distinct aesthetic appeal that sets it apart from conventional shading solutions. The intricate patterns and designs of macramé allow light to filter through, casting beautiful, lace-like shadows that add a touch of elegance and romance to any outdoor space. Additionally, each macramé tent is unique, reflecting the personality and creativity of its maker, making it not just a functional item but also a work of art.
Versatility
One of the most appealing aspects of macramé tents is their versatility. They can be adapted to fit various settings, from bohemian and rustic to modern and minimalist. Macramé tents are perfect for backyards, patios, beach outings, or even as a unique feature at weddings and special events. Their adaptability in style and size makes them an ideal choice for anyone looking to enhance their outdoor decor with a touch of handmade charm.
Necessary Materials
Types of Cord
Choosing the right type of cord is crucial for creating a sturdy and durable macramé tent. Natural fibers like cotton are popular choices due to their softness, ease of use, and eco-friendly nature. Cotton cords come in various thicknesses, which can be selected based on the desired look and strength of the tent. For outdoor use, it’s advisable to consider weather-resistant materials, such as polyester or nylon cords, which offer greater durability and resistance to moisture, sunlight, and other environmental factors.
Basic Tools
To create a macramé tent, you’ll need a few essential tools to get started. These tools will make the process easier and ensure precise and consistent results:
- Scissors: A good pair of sharp scissors is essential for cutting cords cleanly and accurately.
- Measuring Tape or Ruler: Accurate measurements are vital in macramé to ensure that each piece of cord is the correct length, allowing for symmetry and consistency in the design.
- Hooks or Support Structure: Depending on where you plan to set up your macramé tent, you may need sturdy hooks or a support structure to hang the cords from as you work. This will help maintain tension and shape during the knotting process.
Extra Accessories
To add a personal touch to your macramé tent, consider incorporating some optional accessories that can enhance its appearance and functionality:
- Wooden Beads: Adding beads to your macramé tent can introduce a playful or rustic element. Wooden beads, in particular, blend well with natural cords and can be interspersed within the design for added texture and interest.
- LED Lights: For a magical, whimsical effect, weave LED fairy lights into the macramé tent. This addition can create a warm, inviting glow, perfect for evening gatherings or simply to enjoy a serene outdoor ambiance.
- Fabric or Fringe: Incorporating fabric strips or fringe along the edges of the tent can add another layer of texture and movement, enhancing the overall visual impact of your macramé creation.
Step-by-Step Guide to Creating a Macramé Tent
Preparation
Before starting your macramé tent, it’s essential to plan and prepare the materials to ensure a smooth process. Begin by determining the size of the tent you wish to create. This decision will help you calculate the amount of cord needed. A good rule of thumb is to measure out cords that are approximately four to six times the length of the final product, as knotting will use up a lot of cord length. Cut all your cords to the desired lengths, making sure they are of equal size to maintain symmetry in your design. Once your cords are prepared, set up your workspace by hanging the cords from a support structure or hooks to keep them organized and ready for knotting.
Basic Macramé Knots
Understanding and mastering a few basic macramé knots will provide the foundation for creating your macramé tent. Two fundamental knots are essential:
- Square Knot: This versatile knot is formed by using four cords. The two outer cords are crossed over the two middle cords, creating a square shape. It’s one of the most common and widely used knots in macramé projects.
- Double Half Hitch Knot: This knot is used to create lines and patterns within your macramé design. It involves wrapping one cord around an adjacent cord twice, creating a secure hitch. When repeated, it forms a neat, linear pattern that can be used to outline shapes and add structure.
Practicing these knots before starting the tent will help you feel more confident as you begin the main project.
Assembly and Execution
With your cords cut and knots practiced, you are ready to start assembling your macramé tent. Follow these steps to create a beautiful and sturdy design:
- Attach Cords to Support: Begin by folding each cord in half and attaching them to the support structure using a Lark’s Head Knot. This knot will secure the cords and create a row to start from.
- Create the Base Pattern: Using the square knots, start forming the base of your tent. Work across the row, creating a consistent pattern. Continue adding rows of square knots, adjusting the spacing as needed to create the desired shape and density.
- Incorporate Design Elements: Once the base is established, introduce the double half hitch knots to add texture and pattern to the design. Use these knots to create diagonal lines or other decorative elements, enhancing the tent’s visual appeal.
- Expand the Structure: As you progress, expand the pattern by adding more rows of knots. Adjust the lengths of the cords as necessary to create the desired size and shape of your tent. Regularly check for evenness and symmetry.
- Finish the Edges: Once the main body of the tent is complete, finish the edges by trimming the excess cord or adding decorative fringe. Ensure all knots are secure to prevent unraveling.
By following these steps and maintaining attention to detail, you’ll create a beautiful macramé tent that provides both function and style to your outdoor space.
How to Install and Secure the Tent
Choosing the Location
Selecting the right location for your macramé tent is crucial for both functionality and aesthetics. Look for a spot in your backyard that provides enough space for the tent to hang freely without obstructions. Consider areas that get direct sunlight, as the tent will create a shaded, comfortable space underneath. If you have a garden or patio, these are ideal spots to enhance with a macramé tent. Additionally, think about the surroundings; placing the tent near plants or decorative elements can create a more integrated and inviting outdoor environment.
Methods of Securing
There are several methods to secure your macramé tent, depending on the available structures and desired look:
- Using Poles: If you want to set up the tent in an open space, you can install sturdy poles in the ground. Attach the macramé tent to the poles using hooks or ties. Make sure the poles are tall enough to create adequate headroom and are firmly anchored in the ground to withstand wind and movement.
- Utilizing Trees: If you have trees in your yard, they can provide natural support for your macramé tent. Select branches that are strong and at a suitable height. Use durable rope or hooks to attach the tent to the tree, ensuring that the cords are evenly distributed to maintain balance.
- Existing Structures: Another option is to use existing structures, such as pergolas, gazebos, or patio beams, to hang your macramé tent. This method is often the easiest and most stable, as these structures are designed to support weight. Simply tie or hook the tent to the beams, adjusting as needed for the desired height and tension.
Safety and Stability
Ensuring that your macramé tent is safe and stable is essential, especially when it comes to outdoor conditions. Here are some recommendations:
- Anchor Points: Make sure all anchor points, whether poles, trees, or structures, are strong enough to support the weight of the tent. Check for signs of weakness or damage before hanging the tent.
- Tension and Balance: Keep the tension consistent across all attachment points. Uneven tension can cause the tent to sag or tilt, which may lead to instability. Adjust the cords and knots as needed to maintain an even distribution of weight.
- Weather Considerations: Be mindful of the weather. High winds can put additional strain on your macramé tent. If you anticipate strong winds or storms, consider taking down the tent temporarily to prevent damage. Using weather-resistant cords and regularly checking for wear and tear will also help extend the life of your tent.
By carefully selecting the location and using proper securing methods, you can create a beautiful and safe macramé tent that enhances your outdoor space while providing a functional and stylish shaded area.
Tips for Personalization
Variety of Patterns
One of the best ways to personalize your macramé tent is by experimenting with different knot patterns. While the basic square and double half hitch knots form a solid foundation, you can explore more intricate designs to add character. Consider incorporating spiral knots, alternating square knots, or even creating sections with diagonal clove hitches. Mixing these patterns can create a dynamic, visually interesting tent that reflects your personal style. Additionally, using varying cord thicknesses within the same project can add depth and texture to the overall design.
Adding Color
Adding color is an excellent way to make your macramé tent stand out. You can dye the cords in various shades before starting the knotting process, using natural dyes for an eco-friendly approach or fabric dyes for more vibrant colors. For a subtle effect, consider using ombre techniques, where the color gradually transitions from one shade to another. Alternatively, you can incorporate colorful yarn or ribbons into specific sections of your macramé pattern to create striking accents. This approach not only enhances the visual appeal but also allows you to match the tent with the color scheme of your outdoor decor.
Incorporating Plants and Natural Elements
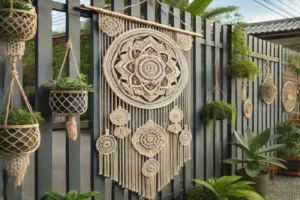
Integrating plants and natural elements into your macramé tent design can bring an organic, earthy feel to the space. You can attach small hanging planters directly to the macramé structure, filling them with cascading greenery or flowers that thrive in outdoor conditions. Succulents, ivy, or ferns are great choices for this purpose. Another idea is to weave natural materials like twigs, driftwood, or seashells into the macramé design. These elements add texture and can create a seamless blend between the tent and the surrounding nature. Not only do these additions make the tent more attractive, but they also create a calming and refreshing environment.
By incorporating a variety of patterns, colors, and natural elements, you can transform a simple macramé tent into a unique and personalized feature that reflects your taste and complements your outdoor space.
Maintenance and Care
Cleaning
Keeping your macramé tent clean is essential to maintain its appearance and longevity, especially since it will be exposed to outdoor elements. Regularly check your tent for dirt, dust, or debris that may have accumulated. To clean the tent, start by gently shaking off loose dirt. For a more thorough cleaning, use a soft brush or cloth to remove any stuck-on particles. If the tent needs washing, mix a mild soap with lukewarm water and gently scrub the cords using a soft brush. Avoid using harsh chemicals or bleach, as these can weaken the fibers. After cleaning, rinse thoroughly with clean water and allow the tent to air dry completely in a shaded area to prevent any damage from direct sunlight.
Repairs
Despite careful handling, macramé tents may occasionally suffer damage due to weather conditions or general wear and tear. It’s important to inspect the tent regularly for signs of fraying, broken cords, or loosening knots. If you find any damaged areas, act quickly to prevent further deterioration. For minor fraying, trim the affected ends neatly and apply a fabric glue or clear nail polish to prevent unraveling. In the case of broken cords, replace them by carefully untying the surrounding knots and inserting a new cord of the same length and type. Re-knot the area, ensuring the new cord blends seamlessly with the rest of the design. For more complex repairs or if you are unsure about how to proceed, consult a macramé guide or seek help from someone experienced in macramé projects.
By following these cleaning and repair tips, you can keep your macramé tent looking beautiful and functioning well, allowing it to remain a charming and integral part of your outdoor decor for years to come.
Conclusion
Creating a macramé tent is a wonderful way to add both function and style to your outdoor space. These elegant, handcrafted shades provide a unique aesthetic that sets them apart from conventional tents, combining beauty with practicality. The process of making a macramé tent is simpler than it may seem, even for beginners. With the right materials, some basic knotting skills, and a bit of creativity, anyone can craft a stunning macramé tent that offers shade and transforms the ambiance of their backyard or garden.
Now that you know how to create your own macramé tent, why not give it a try? We encourage you to experiment with different patterns, colors, and natural elements to make your tent truly unique. Once you’ve completed your project, we’d love to see the results! Share your macramé tent creations or experiences in the comments below. Your ideas could inspire others to embark on their own macramé journey.
As you embark on this creative endeavor, remember to refer back to this macramétenttutorial for guidance and inspiration. Happy knotting!


