Introduction
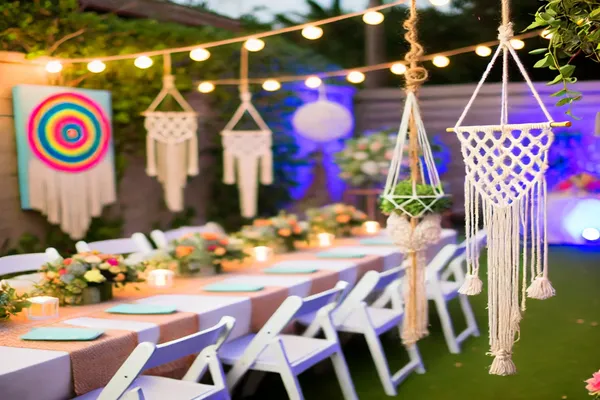
Macramé, the art of knotting cords in decorative patterns, has seen a resurgence in popularity as a favored crafting technique. This age-old method, known for its intricate and beautiful designs, has made a significant comeback in modern home decor and fashion. From plant hangers to wall art, macramé is celebrated for its versatility and ability to bring a bohemian, natural touch to any space.
In this tutorial, we will introduce a unique application of macramé: creating a comfortable and stylish macramé lounger. Perfect for unwinding after a long day, a macramé lounger combines both aesthetics and functionality, providing a cozy spot to relax while enhancing the look of your home or garden.
The goal of this article is to guide you through the process of making your very own macramé lounger. Whether you’re a beginner or an experienced crafter, this tutorial will provide you with easy-to-follow steps and helpful tips to create a beautiful piece that you can proudly showcase. Let’s dive into the world of macramé and create a lounger that will become your favorite spot to relax!
What is Macramé?
Macramé is a crafting technique that involves knotting cords into various decorative patterns without the use of needles or hooks. The term “macramé” originates from a 13th-century Arabic word, meaning “fringe,” which refers to the decorative fringe often seen on handmade items. Historically, macramé was used by sailors to create intricate decorations and items they could trade during their voyages, such as belts, hammocks, and covers.
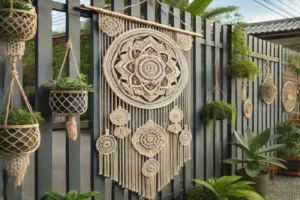
Today, macramé has become a beloved art form, finding its place in modern interior decoration and fashion. It is commonly used to create beautiful wall hangings, plant hangers, curtains, jewelry, and various types of accessories. The resurgence of interest in handmade and sustainable decor has further popularized macramé, as it brings a natural, bohemian, and artistic touch to any space.
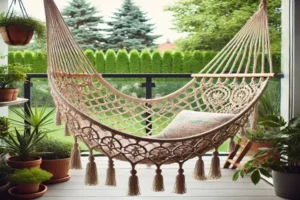
Beyond its traditional uses, macramé is now being applied to furniture and items designed for relaxation, such as loungers. These macramé loungers offer a perfect blend of style and comfort, making them a unique addition to any home or outdoor setting. The intricate knot patterns not only provide a comfortable place to sit or lay down but also serve as a striking visual element, elevating the aesthetics of the space.
Required Materials
Before starting your macramé lounger project, it’s essential to gather all the necessary materials. Having the right tools and supplies will make the process smoother and ensure that your final product is both beautiful and durable. Below is a detailed list of materials you will need:
- Macramé Cord: Choose a sturdy, thick cord that can support weight. For loungers, it’s recommended to use cords that are at least 5mm thick. Natural fibers like cotton, jute, or hemp are popular choices due to their strength and aesthetic appeal.
- Wooden Rings: These rings will be used to attach the lounger to a support structure, such as a frame or ceiling hooks. Make sure to choose rings that are strong and large enough to accommodate multiple strands of cord.
- Scissors: A good pair of sharp scissors is essential for cutting the macramé cords cleanly and precisely.
- Measuring Tape: To ensure all cords are cut to the correct length, a measuring tape will be necessary.
- Support Structure: You may need a dowel, metal rod, or even a wooden frame, depending on where you plan to hang your lounger. This will serve as the foundation for knotting your macramé cords.
Where to Find Quality Materials
You can find macramé supplies at most craft stores, online marketplaces, and specialty stores dedicated to fiber arts. Online retailers like Amazon, Etsy, and dedicated craft websites offer a wide variety of cords, rings, and other macramé tools. It’s worth investing in high-quality materials to ensure that your lounger is durable and looks professional.
Tips for Choosing Durable and Comfortable Materials
When selecting materials for your macramé lounger, focus on both durability and comfort. Natural fibers like cotton are soft to the touch and provide a comfortable lounging experience. However, they can be more susceptible to wear and tear, so thicker cords or blends with synthetic fibers might be preferable for increased durability. Also, consider the environment where the lounger will be placed; for outdoor use, choose materials that are resistant to moisture and UV rays to prevent damage and fading.
By carefully selecting your materials, you can create a macramé lounger that is not only visually appealing but also comfortable and long-lasting, ensuring it will be a cherished piece in your home for years to come.
Preparing Your Workspace
Creating a macramé lounger is a project that requires focus, patience, and a well-organized workspace. Having the right setup will make your crafting process more enjoyable and efficient. Here are some guidelines to help you prepare your workspace for working with macramé:
- Choose a Spacious Area: Select a space that is large enough to accommodate your materials and tools comfortably. You’ll need room to lay out long cords and maneuver them easily. A table or workbench with a clear surface is ideal, but you can also use a section of the floor if that suits your working style.
- Organize Your Tools and Materials: Keep all your tools, such as scissors, measuring tape, and cords, within easy reach. Use containers or trays to organize small items like rings and keep your cords neatly rolled or hung to prevent tangling. Having everything organized will save time and reduce frustration during the crafting process.
- Set Up Proper Lighting: Good lighting is crucial when working with macramé, especially for detailed knotting. Natural light is ideal, so choose a workspace near a window if possible. If natural light isn’t available, use a bright desk lamp or overhead lighting to illuminate your work area. Ensure that the light source doesn’t cast harsh shadows on your work, which can make it difficult to see the knots clearly.
Tips for a Tangle-Free Workspace
Working with long cords can sometimes lead to tangling, which can be frustrating and time-consuming to fix. To prevent this, try the following tips:
- Use Cord Organizers: Clip or secure the ends of your cords with small clamps or cord holders to prevent them from unraveling and tangling while you work.
- Work Methodically: Only unravel the amount of cord you need at any given moment. This will keep the remaining cord neatly coiled and out of the way.
- Check Regularly: Periodically check that your cords aren’t tangling or crossing each other unnecessarily. A quick check can save you from dealing with a bigger mess later on.
Safety Considerations
While macramé is a relatively safe craft, it’s essential to maintain a clutter-free workspace to avoid accidents. Keep scissors and other sharp tools safely stored when not in use, and be mindful of the cords underfoot to prevent tripping. A clean, organized workspace not only helps you work more efficiently but also ensures your safety.
By preparing your workspace thoughtfully, you set yourself up for a successful and enjoyable macramé experience. A well-organized and properly lit space will help you stay focused, avoid common pitfalls, and fully enjoy the creative process of making your macramé lounger.
Step-by-Step Project Guide (macraméloungertutorial)
Measuring and Cutting the Cords
The first step in making your macramé lounger is to accurately measure and cut the cords. The length of the cords will depend on the size of the lounger you wish to create. A good rule of thumb is to use cords that are four to five times the desired length of the finished lounger. This extra length accounts for the knots and the thickness of the design.
Once you have calculated the necessary length, cut the cords using sharp scissors to ensure clean edges. Prepare multiple cords of the same length, as you will need several to create a sturdy and balanced design. For example, if you’re making a lounger that is 6 feet long, each cord should be approximately 24 to 30 feet in length.
Starting with the Base Knot
After cutting your cords, the next step is to begin with a base knot. This knot will serve as the foundation for your entire project, so it must be strong and secure. A common base knot used in macramé loungers is the Lark’s Head Knot. To create this knot, fold each cord in half and loop the folded end over your support structure (such as a dowel or wooden ring), then pull the loose ends through the loop.
Ensuring that these knots are tight and evenly spaced will provide a solid starting point for your lounger. Take your time to adjust and tighten the knots as needed, creating a firm base that will support the weight and design of the lounger.
Creating the Macramé Pattern
With the base knots in place, you can begin creating the macramé pattern. This is where your creativity comes into play. Popular patterns include the Square Knot, Spiral Knot, and Half Hitch Knot, each offering a different texture and look.
To create a Square Knot, take four cords: hold two middle cords (anchors) and use the outer cords to tie a knot around them, alternating sides. For a Spiral Knot, repeat the first half of a square knot continuously without alternating sides, which will create a twist.
Use diagrams or photos as references to help visualize the knots and patterns. Practice each knot with short pieces of cord if needed before applying them to your lounger. Continue knotting until you achieve the desired length and pattern, adjusting tension as you go to maintain consistency.
Attaching the Rings and Finalizing the Lounger
The final step is to attach wooden rings to the ends of the lounger for support. Thread the loose ends of your cords through the rings and tie secure knots to fasten them. These rings will allow you to hang the lounger from a frame, ceiling, or sturdy support.
Once the rings are attached, inspect the entire lounger for stability. Make sure all knots are secure and that the pattern is consistent. Test the lounger by applying gentle pressure to ensure it can support weight without slipping or unraveling.
Finally, trim any excess cord and make any necessary adjustments to the design. Your macramé lounger is now complete and ready to provide a stylish and comfortable spot for relaxation!
Tips for Personalizing Your Macramé Lounger
Creating a macramé lounger offers an excellent opportunity to express your personal style and creativity. While the basic design of the lounger is functional and aesthetically pleasing, adding personalized touches can make it even more special. Here are some tips on how to customize your macramé lounger to suit your taste and decor:
Adding Cushions and Decorative Elements
One of the easiest ways to enhance the comfort and style of your macramé lounger is by adding cushions. Choose cushions that complement the color and texture of your macramé work. Soft, plush cushions can make the lounger more comfortable, while vibrant, patterned cushions can add a pop of color and visual interest.
In addition to cushions, consider incorporating throws or small blankets that can be draped over the lounger. These elements not only add coziness but also allow you to easily change the look of your lounger to match different seasons or decor styles.
Decorative elements like tassels, beads, or small charms can also be added to the macramé cords. These details can enhance the visual appeal and give your lounger a unique, personalized touch. When choosing decorative elements, ensure they are securely attached and won’t interfere with the comfort or function of the lounger.
Choosing Colors and Patterns
The color of your macramé cord can significantly impact the overall look of your lounger. Neutral colors like white, beige, and gray are popular choices for a minimalist, natural look that blends well with most decor styles. For a more vibrant and eye-catching design, consider using colored cords in shades that complement your interior or outdoor setting.
Patterns also play a key role in personalizing your macramé lounger. Experiment with different knotting techniques to create intricate designs or simple, clean lines. You can even combine multiple patterns in a single lounger for a more complex and artistic look. If you’re new to macramé, starting with basic patterns and gradually incorporating more complex designs as you gain confidence can be a rewarding approach.
Maintaining Your Macramé Lounger
To keep your macramé lounger looking its best, regular maintenance is essential. If your lounger is used outdoors, consider bringing it inside during inclement weather to protect it from moisture and UV rays, which can cause the cords to deteriorate over time. If it’s left outside, using a waterproof cover can help extend its lifespan.
Clean your lounger periodically by dusting it off and spot-cleaning any stains with a mild detergent and water. Avoid harsh chemicals that could weaken the fibers. If your lounger has cushions or additional fabric elements, check the care instructions and clean them as recommended.
Inspect your lounger regularly for any signs of wear or fraying, especially around the knots and rings. If you notice any damage, repair it promptly to prevent further deterioration. By taking these simple maintenance steps, your macramé lounger will remain a beautiful and relaxing feature in your home for years to come.
Where to Use Your Macramé Lounger
A macramé lounger is not only a stylish and unique piece of furniture, but it also offers versatile options for use in various spaces. Here are some ideal places where you can enjoy your macramé lounger and how to integrate it seamlessly into your decor:
Ideal Places to Use the Lounger
- Garden or Patio: One of the best places to use a macramé lounger is outdoors in a garden or patio. The natural look of macramé complements the greenery and flowers, creating a tranquil environment perfect for relaxation. Hang the lounger from a sturdy tree branch or a specially designed stand to enjoy reading, napping, or simply soaking in nature.
- Balcony: If you live in an apartment or have limited outdoor space, a balcony is an excellent spot for your macramé lounger. Hanging the lounger on your balcony provides a cozy nook to unwind while enjoying fresh air and views. Ensure that the balcony has enough structural support to hold the weight of the lounger and its user.
- Living Room: Bring the bohemian charm of a macramé lounger indoors by placing it in your living room. It can serve as a unique seating option and a statement piece that adds texture and interest to your decor. Position the lounger near a window to take advantage of natural light or next to a bookshelf for a cozy reading corner.
- Bedroom: For a serene and relaxing vibe, hang a macramé lounger in your bedroom. It can be a perfect spot for morning meditation or winding down before bedtime. Choose a corner of the room where the lounger can swing freely without obstruction.
Integrating the Macramé Lounger into Your Decor
Integrating a macramé lounger into your home or outdoor decor is easy due to its versatile and natural appearance. To create a cohesive look, consider matching the color of the macramé cords with your existing color scheme. Neutral-colored loungers blend seamlessly with most decors, while bolder colors can make a statement.
Enhance the area around the lounger with complementary accessories like potted plants, soft lighting, and cozy rugs. Adding throw pillows or a blanket that echoes the colors and textures of your room can create a harmonious and inviting space.
Benefits of Using a Macramé Lounger for Relaxation
A macramé lounger offers more than just aesthetic appeal; it provides a comfortable and relaxing seating option that can help reduce stress and promote well-being. The gentle swaying motion of a hanging lounger can have a calming effect, making it an excellent spot for relaxation or meditation.
Spending time in a macramé lounger can also encourage you to disconnect from technology and enjoy moments of tranquility. Whether you use it for reading, listening to music, or simply relaxing, a macramé lounger can become a favorite retreat where you can unwind and recharge.
Conclusion
Creating a macramé lounger is a rewarding project that combines creativity, craftsmanship, and practicality. Throughout this guide, we’ve covered everything from gathering materials and preparing your workspace to mastering knotting techniques and personalizing your design. By following these steps, you can craft a beautiful and functional macramé lounger that not only serves as a stylish piece of furniture but also as a personal haven for relaxation.
Macramé offers more than just a finished product; it provides an opportunity to engage in a calming, meditative process. The repetitive nature of knotting can be incredibly soothing, helping to reduce stress and enhance mindfulness. This craft allows you to express your creativity while also creating something that you can use and enjoy daily. The tactile experience of working with cords and creating intricate patterns can be both therapeutic and fulfilling.
We encourage you to try making your own macramé lounger and experience the joy of creating something with your hands. Whether you’re a beginner or an experienced crafter, this project can be adapted to suit your skill level and personal style. Don’t hesitate to experiment with different patterns, colors, and decorative elements to make your lounger uniquely yours.
As you embark on your macramé journey, we’d love to see the results of your creativity! Share photos of your finished macramé lounger and your crafting process in the comments section below or on social media. Use the hashtag #macraméloungertutorial so we can celebrate your achievements together. Happy crafting, and may your macramé lounger bring you many moments of relaxation and joy!


