Introduction
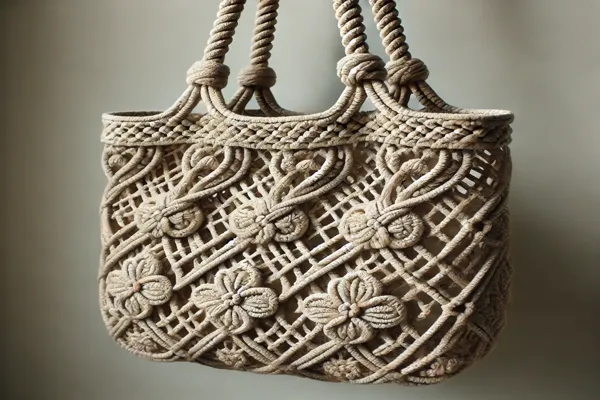
Macramé, an ancient craft technique, has recently made a significant comeback in the world of fashion and home décor. Once popular in the 1970s, macramé is now being embraced for its bohemian charm and handmade appeal. Among its many applications, macramé bags have become a favorite for their unique aesthetic and functional design, perfect for adding a touch of creativity to your everyday style.
These bags are not only stylish but also incredibly practical. They can be customized in various sizes and styles, making them suitable for daily use, whether you’re heading to the market, the beach, or a casual outing. The beauty of macramé lies in its versatility—no two pieces are exactly alike, allowing you to create a bag that truly reflects your personal style.
In this tutorial, we’ll walk you through the steps to create your very own macramé bag. Whether you’re a seasoned crafter or new to the art of macramé, this guide will provide you with all the information you need to craft a beautiful, durable bag that you can use every day. Let’s get started!
Materials You’ll Need
To create a stunning and durable macramé bag, having the right materials is essential. In this macramé bag tutorial, we’ll outline everything you need to get started on your project.
Macramé Cord:
The most important material is the macramé cord. You’ll want to choose a cord that is strong and durable, yet flexible enough to work with. For bags, a thicker cord (around 3-5mm) is ideal, as it provides the necessary strength to hold items without compromising on style. Natural fibers like cotton or jute are popular choices due to their softness and eco-friendliness.
Scissors:
A good pair of sharp scissors is crucial for cutting your macramé cord to the desired lengths. Make sure your scissors are sharp enough to make clean cuts, which will help prevent fraying and ensure a neat finish.
Measuring Tape:
Accurate measurements are key to ensuring that your macramé bag turns out the right size. A measuring tape will help you cut your cords to the correct lengths, allowing you to follow the pattern precisely.
Beads (Optional):
If you want to add a decorative touch to your macramé bag, consider incorporating beads into your design. Wooden or metal beads can add a unique element to your bag, making it stand out. Ensure that the bead holes are large enough to fit your cord.
Pins or Tape:
These tools can help you secure your cords while you work. Use pins to attach your work to a board or tape to secure it to a flat surface, which will keep your project steady as you knot the cords.
Tips on Selecting the Right Cord:
When choosing a cord, consider both the aesthetic and functional aspects. A thicker cord will result in a bulkier, more durable bag, while a thinner cord will create a more delicate design. Additionally, think about the color and texture of the cord—neutral tones are versatile and easy to match with outfits, while bold colors can make a statement. Lastly, ensure that the cord you choose is strong enough to support the weight of items you plan to carry in your bag.
With these materials in hand, you’re ready to begin your macramé bag project. Having high-quality tools and supplies will make the process smoother and more enjoyable, setting you up for success as you move on to the knotting and crafting stages.
Basic Macramé Knots
In this macramé bag tutorial, mastering a few basic knots is essential before you begin crafting your bag. These knots form the foundation of your design, giving your bag both structure and style.
Square Knot:
The square knot is one of the most fundamental knots in macramé. It’s versatile and sturdy, often used to create flat or patterned sections in your bag. To make a square knot:
- Start with four cords: two center cords and two working cords (the outer cords).
- Cross the left working cord over the two center cords, then pass it under the right working cord.
- Now, take the right working cord and pass it under the two center cords and up through the loop created by the left cord.
- Pull both working cords to tighten the knot, completing the first half of the square knot.
- Repeat the process, but this time start by crossing the right working cord over the two center cords, then passing it under the left working cord. Tighten to complete the square knot.
Half Hitch:
The half hitch is a simple knot often used to create diagonal or horizontal lines in macramé designs. It can be done using one or multiple cords:
- Begin with two cords: a holding cord (the one that stays in place) and a working cord (the one you will move).
- Loop the working cord over the holding cord, bringing it behind and through the loop you just created.
- Pull tight to create a half hitch knot.
- You can repeat this knot to create rows of half hitches, adjusting the angle of the knots to create different patterns.
Lark’s Head Knot:
The lark’s head knot is used to attach cords to a ring or a dowel, and it’s typically the first knot you’ll use in a macramé project:
- Fold your cord in half to create a loop.
- Place the loop over the ring or dowel.
- Pull the ends of the cord through the loop, tightening it against the ring or dowel.
- This simple knot secures your cord and serves as the starting point for many macramé patterns.
Practicing Your Knots:
Before you begin your macramé bag, it’s a good idea to practice these basic knots until you feel confident. Use spare cord to create small swatches, experimenting with different combinations of knots. This practice will help you understand the tension and placement needed to achieve a uniform look in your bag. As you practice, pay attention to the consistency of your knots, as even tension is key to creating a polished and professional-looking macramé bag.
By mastering these basic knots, you’ll be well-prepared to start crafting your macramé bag, confident in your ability to create a sturdy and stylish accessory that’s perfect for daily use.
Step-by-Step Macramé Bag Tutorial
In this macramé bag tutorial, we’ll walk you through the process of creating a stylish and functional macramé bag from start to finish. Follow these detailed steps to craft your own unique accessory.
Creating the Base of the Bag:
To begin, you’ll need to measure and cut your cords to the appropriate length. For a standard-sized bag, cut 16 cords, each about 2 meters long. You may adjust the length depending on the size of the bag you wish to create.
- Step 1: Start by attaching the cords to your dowel or ring using the lark’s head knot. Arrange the cords evenly, ensuring they are secure and neatly aligned.
- Step 2: Create the first row using square knots. Take four cords and create a square knot as described in the previous section. Repeat this across the row until all cords are knotted.
- Step 3: For the second row, skip the first two cords and begin your square knots with the third cord, creating an alternating pattern. This will help build the structure of the bag and add to its aesthetic appeal.
- Step 4: Continue this pattern, alternating the placement of the square knots for approximately 10-15 rows, depending on your desired bag depth.
Adding Handles:
Once the body of the bag is complete, it’s time to add the handles. You can make the handles using the same macramé cord or opt for a different material, such as leather or wooden handles, for added contrast.
- Step 1: Decide on the length of your handles. For shoulder-length handles, cut two cords approximately 1 meter each.
- Step 2: Attach the handles to the top of the bag using square knots or simple overhand knots, ensuring they are evenly spaced and securely attached.
- Step 3: If using an alternative material for the handles, sew or knot the ends of the material directly onto the bag, reinforcing the attachment to ensure durability.
Optional Decorative Elements:
To give your macramé bag a personal touch, consider adding decorative elements like fringe or beads.
- Fringe: Cut additional cords to your desired length and attach them to the bottom of the bag or along the sides using lark’s head knots. Trim the fringe to ensure it’s even, or leave it uneven for a more bohemian look.
- Beads: Thread beads onto selected cords before knotting to incorporate them into the design. You can add beads randomly or in a specific pattern for a more structured look.
Ensuring Strength and Durability:
Since your macramé bag is intended for daily use, it’s important to ensure that it’s strong enough to hold your belongings.
- Tip 1: Use a thicker cord, as mentioned earlier, for added durability. The thicker the cord, the stronger your bag will be.
- Tip 2: Double-knot sections that will bear the most weight, such as the base and handles, to prevent the bag from loosening over time.
- Tip 3: Before using the bag, test it by placing items inside to check for any weaknesses. Make adjustments if necessary, reinforcing any areas that seem less secure.
By following these steps, you’ll create a beautiful macramé bag that’s not only fashionable but also practical for everyday use. Whether you’re new to macramé or an experienced crafter, this step-by-step tutorial will guide you through the process, ensuring a satisfying and successful project.
Customizing Your Macramé Bag
One of the most enjoyable aspects of creating a macramé bag is the ability to customize it to reflect your personal style. In this section, we’ll explore a variety of ideas for adding your unique touch to your macramé bag, from color choices to pattern variations and embellishments.
Personalizing with Colors:
The color of the cord you choose can drastically change the look and feel of your macramé bag. Here are a few ideas to consider:
- Bold and Bright: Choose vibrant colors like teal, coral, or mustard yellow to make your bag a standout accessory. Bright colors are perfect for summer bags and can add a pop of fun to any outfit.
- Neutral and Natural: Opt for earthy tones like beige, cream, or olive green for a more subtle, bohemian look. These colors are versatile and can easily match any wardrobe.
- Ombre Effect: Create a gradient effect by using different shades of the same color. Start with the darkest shade at the bottom of the bag and gradually transition to a lighter shade at the top.
Experimenting with Patterns:
The knots you choose and how you arrange them can create different patterns in your macramé bag. Here are a few pattern ideas:
- Chevron Pattern: Achieve a chevron or zigzag pattern by alternating the direction of your square knots. This adds a dynamic visual element to your bag.
- Diamond Pattern: Create diamond shapes by grouping knots together in specific patterns. This gives your bag a more intricate and detailed appearance.
- Stripes: Use cords of different colors to create horizontal or vertical stripes on your bag. This is a simple yet effective way to add interest to your design.
Adding Embellishments:
Enhance your macramé bag with decorative elements that add texture and personality.
- Beads: Incorporate wooden or metal beads into your knots to add a boho-chic touch. You can place beads at intervals along the cord or cluster them at specific points.
- Fringe: Add fringe along the bottom of the bag or at the sides for a playful and relaxed vibe. Fringe can be trimmed evenly or left uneven for a more organic look.
- Tassels: Attach tassels to the handles or corners of the bag for an extra decorative flourish. Tassels can be made from the same cord or contrasting colors for added interest.
Adjusting Size and Shape:
Your macramé bag can be customized not only in appearance but also in size and shape to meet your specific needs.
- Tote Bag: For a larger, more spacious bag, increase the number of cords and extend the length of the body. This style is perfect for carrying groceries or beach essentials.
- Crossbody Bag: For a smaller, more compact design, reduce the number of cords and shorten the body. Add a long strap for easy, hands-free carrying.
- Clutch: Create a sleek and stylish clutch by making a flat, rectangular shape with a fold-over flap. This design is ideal for evenings out or special occasions.
Customizing your macramé bag allows you to create a piece that is truly your own. Whether you prefer bold patterns and colors or a more subdued, natural look, the possibilities are endless. Experiment with different ideas and techniques to craft a bag that not only meets your practical needs but also showcases your creative flair.
Care and Maintenance of Your Macramé Bag
Once you’ve completed your beautiful macramé bag, it’s essential to care for it properly to ensure it remains in excellent condition for daily use. In this macramé bag tutorial, we’ll provide tips on how to clean, store, and handle your bag to keep it looking as good as new.
Cleaning Your Macramé Bag:
Macramé bags, particularly those made from natural fibers, require gentle care when cleaning to maintain their texture and appearance.
- Spot Cleaning: For minor stains or dirt, use a damp cloth and mild soap to spot clean the affected area. Gently blot the stain rather than rubbing, which can cause the fibers to fray or stretch.
- Hand Washing: If your bag needs a more thorough cleaning, hand washing is the safest method. Fill a basin with lukewarm water and a small amount of gentle detergent. Submerge the bag and gently agitate it with your hands. Avoid scrubbing too hard to prevent damaging the knots.
- Drying: After washing, reshape the bag and lay it flat on a clean, dry towel to air dry. Avoid hanging the bag while wet, as this can cause it to stretch out of shape. Ensure the bag is completely dry before using it again to prevent mildew.
Storing Your Macramé Bag:
Proper storage is crucial to preserving the shape and integrity of your macramé bag.
- Avoid Hanging: While it might be tempting to hang your bag on a hook, doing so can cause it to stretch, especially if the bag is heavy or has a lot of fringe. Instead, store the bag flat in a drawer or on a shelf.
- Stuffing for Shape: To maintain the bag’s shape, especially if it’s not in regular use, stuff it with tissue paper or a soft cloth. This will help prevent the bag from flattening out or losing its form.
- Protect from Dust: If you’re storing your bag for an extended period, consider placing it in a breathable fabric bag or pillowcase to protect it from dust. Avoid using plastic bags, as they can trap moisture and cause mold.
Handling Your Macramé Bag:
Gentle handling is key to ensuring your macramé bag lasts for years to come.
- Avoid Overloading: While macramé bags are durable, overloading them with heavy items can stretch the fibers and distort the shape. Be mindful of the weight you carry in the bag to maintain its structure.
- Preventing Snags: Macramé bags, with their intricate knots and open spaces, can be prone to snagging on sharp objects. Take care when placing your bag on rough surfaces or near sharp edges to avoid pulling or fraying the cords.
By following these care and maintenance tips, your macramé bag will remain a stylish and functional accessory for years. Proper cleaning, storage, and handling are all essential to preserving the beauty and durability of your handmade creation. Whether you’re using your bag daily or storing it for special occasions, these practices will help keep it in top condition, ready to complement your outfits whenever you need it.
Conclusion
Creating a macramé bag is a wonderfully simple and creative process that allows you to express your personal style while crafting something truly functional. With just a few basic knots and some thoughtful design choices, you can produce a beautiful, durable bag that’s perfect for everyday use. The beauty of macramé lies in its flexibility—each bag is a unique reflection of the maker’s creativity, with endless possibilities for customization.
As you complete your macramé bag, don’t be afraid to experiment with different colors, patterns, and embellishments. Try out new techniques, or even design your own patterns to make a bag that’s uniquely yours. The more you practice and explore, the more confident you’ll become in your macramé skills, and the more innovative your designs will be.
We’d love to see what you create! Share your macramé bag designs and experiences in the comments below or on social media. Your creativity might just inspire someone else to start their own macramé journey. Happy crafting!


