Introduction
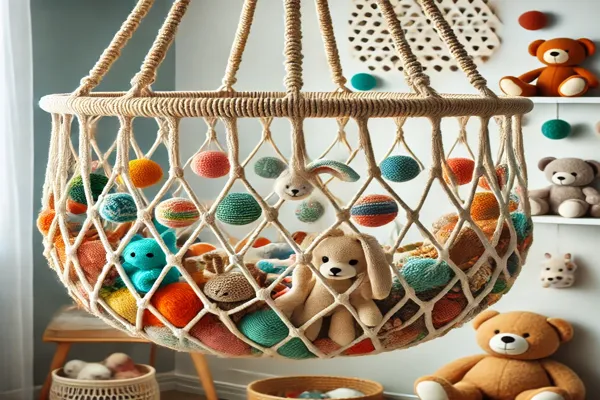
Macramé toy nets are a fantastic way to combine functionality with creativity in your child’s room. These nets not only serve as a practical solution for storing toys but also add a unique, handmade touch to the room’s décor. In a world where keeping a kid’s room tidy can feel like an endless battle, a macramé toy net offers a stylish and efficient way to manage clutter while ensuring toys are easily accessible.
Using a macramé toy net provides several benefits. First, it saves space by utilizing vertical storage, which is particularly useful in smaller rooms. By keeping toys off the floor and neatly organized, the room feels more spacious and less chaotic. Additionally, the handcrafted nature of macramé adds an element of artistry, making the net more than just a storage solution—it becomes part of the room’s decoration.
In this guide, you will learn everything you need to create your own macramé toy net, from gathering the necessary materials to step-by-step instructions on weaving the net. Whether you’re new to macramé or looking to expand your DIY skills, this project is accessible and rewarding, providing a personalized touch to your child’s space.
Materials Needed for a Macramé Toy Net
To create a sturdy and visually appealing macramé toy net for your child’s room, it’s essential to gather the right materials. Below is a detailed list of everything you’ll need to get started.
List of Materials
The primary materials required for making a macramé toy net include:
- Rope: Depending on the size of the net, you’ll need several meters of rope. Cotton rope is commonly used for macramé projects due to its softness and ease of knotting.
- Scissors: A sharp pair of scissors will be necessary for cutting the rope to the desired lengths.
- Measuring Tape: Accurate measurements are crucial to ensure the net fits perfectly in the intended space.
- Hooks: You’ll need sturdy hooks or wall anchors to hang the finished net securely on the wall or ceiling.
Choosing the Right Rope
Selecting the appropriate rope is critical for the safety and durability of the macramé toy net. Here are a few options to consider:
- Cotton Rope: Soft and flexible, cotton rope is an excellent choice for macramé projects. It’s easy to work with and provides a smooth finish. Additionally, it’s gentle on the hands, making it ideal for intricate knotting.
- Nylon Rope: Nylon rope is strong and durable, offering high resistance to wear and tear. It’s slightly more challenging to work with than cotton, but its strength makes it suitable for holding heavier toys.
- Polyester Rope: Polyester rope is another durable option that resists stretching and shrinking. It’s a bit less flexible than cotton, but it’s a good choice for a long-lasting net.
When choosing the rope, consider the thickness as well. Thicker ropes are stronger and create a bulkier look, while thinner ropes result in a more delicate appearance.
Additional Tools
While the basic materials listed above are sufficient for creating a macramé toy net, a few additional tools can make the process easier and more efficient:
- Macramé Board: A macramé board provides a stable surface for knotting, helping you keep your work organized and preventing the ropes from tangling.
- Clips or Pins: These can be used to hold the ropes in place as you work, ensuring that your knots stay tight and evenly spaced.
- Comb: A small comb can help you neatly separate the strands of the rope, especially if you’re using a twisted or braided type.
By gathering these materials and tools before starting your project, you’ll set yourself up for success, making the macramé toy net creation process smooth and enjoyable.
Preparing the Workspace and Measuring
Before diving into the creation of your macramé toy net, it’s essential to properly prepare your workspace and ensure accurate measurements. This preparation will make the process smoother and more enjoyable.
Setting Up the Workspace
Creating a comfortable and organized workspace is key to successfully completing your macramé project. Here are some tips:
- Choose a Spacious Area: Ensure you have enough room to spread out your materials and work comfortably. A large table or even the floor can serve as a good workspace.
- Good Lighting: Proper lighting is crucial, especially when working with intricate knots. Make sure your workspace is well-lit to reduce eye strain and help you see the details clearly.
- Keep Tools Within Reach: Arrange your tools, such as scissors, measuring tape, and rope, within easy reach. This will save time and help you stay focused on the task at hand.
- Use a Macramé Board or Hanger: If possible, secure your project to a macramé board or a wall-mounted hanger. This will keep your work stable and allow you to maintain consistent tension in your knots.
Measuring the Space
Accurate measurements are vital to ensure that your macramé toy net fits perfectly in the designated area. Follow these steps:
- Determine the Placement: Decide where you want to install the toy net—whether in a corner, above a bed, or along a wall. Visualize how the net will look in that space.
- Measure the Area: Use a measuring tape to determine the width and height of the space where the net will be hung. Note down these measurements as they will guide you in cutting the rope to the correct lengths.
- Allow for Sag: Consider how much you want the net to sag when filled with toys. A slight sag is usually desirable, but be sure to factor this into your measurements to avoid a net that hangs too low.
Cutting the Rope
Once you have your measurements, it’s time to cut the rope. Here’s how to calculate the right length:
- Calculate Rope Length: For most macramé projects, you’ll need to cut the rope longer than the finished size to account for the knots. A general rule is to multiply the desired length by 4 to 6 times, depending on the complexity of the knots you plan to use.
- Cutting with Precision: Measure each piece of rope carefully before cutting. It’s better to cut a little extra length than to end up with ropes that are too short.
- Prepare All Strands: Cut all the ropes you’ll need before you start knotting. This will save time and ensure consistency throughout your project.
By setting up your workspace properly, measuring accurately, and cutting the rope with care, you’ll be well-prepared to start crafting your macramé toy net. This preparation is essential to achieving a professional-looking result that fits perfectly in your child’s room.
Step-by-Step Instructions to Make a Macramé Toy Net
Creating a macramé toy net is a rewarding project that combines creativity with practicality. Follow these step-by-step instructions to craft a sturdy and stylish toy net for your child’s room.
Basic Knots Overview
Before you begin, it’s essential to familiarize yourself with a few basic macramé knots that will be used throughout the project:
- Square Knot: This is the foundation of many macramé designs. It involves using four strands, with the outer two strands being crossed over the middle two to form a knot. The square knot is versatile and provides a secure hold.
- Clove Hitch: The clove hitch is another crucial knot, often used to attach ropes to a rod or ring. It’s created by looping the rope around the base, then threading the end under the loop to secure it.
- Lark’s Head Knot: This knot is used to attach your ropes to the starting ring or rod. It’s simple to make and provides a neat, stable beginning for your project.
Creating the Base
The base of your macramé toy net sets the stage for the entire structure. Here’s how to get started:
- Attach the Ropes: Begin by cutting your ropes to the desired lengths, as calculated earlier. Fold each piece of rope in half and use a lark’s head knot to attach them to your starting ring or rod. Make sure the ropes are evenly spaced for a balanced design.
- Secure the Base: Once all the ropes are attached, use clove hitches or square knots to secure the base. This will ensure that the ropes don’t shift as you begin to weave the net.
Weaving the Net
Now that your base is ready, it’s time to weave the net. Follow these detailed steps:
- First Row of Knots: Start by making a series of square knots across the first row of ropes. To do this, take four adjacent strands and create a square knot, repeating the process across the entire row. Ensure that the knots are tight and evenly spaced.
- Second Row: For the second row, use the two outer strands from one knot and the two inner strands from the adjacent knot to form another square knot. This creates a diamond pattern as you progress.
- Continue Weaving: Repeat this process for several rows, depending on how large you want the net to be. As you weave, make sure to maintain even tension in the ropes to create a uniform pattern.
- Checking for Strength: Periodically test the strength of the net by gently pulling on it. The knots should hold firm without any gaps or loose strands.
Finishing Touches
With the weaving complete, it’s time to finish the macramé toy net and add any decorative elements:
- Securing the Ends: Tie off the ends of the ropes with secure knots, such as a double overhand knot, to prevent them from unraveling. Trim any excess rope neatly with scissors.
- Adding Decorations: If you want to personalize the toy net, consider adding tassels, beads, or other embellishments to the ends of the ropes. This adds a playful touch and can help match the net to the room’s décor.
- Final Check: Before hanging the net, give it a final once-over to ensure all knots are secure and the design is consistent.
By following these instructions, you’ll create a beautiful and functional macramé toy net that will help keep your child’s room organized and stylish.
Installing the Macramé Toy Net in a Kid’s Room
Once your macramé toy net is complete, the next step is to install it in your child’s room. Proper installation is crucial to ensure that the net is both functional and safe.
Finding the Right Spot
Choosing the best location for the macramé toy net will not only enhance the room’s aesthetics but also maximize its utility. Here are some ideal spots to consider:
- Corners: Hanging the toy net in a corner is a great way to utilize otherwise unused space. Corners are typically out of the way, making them perfect for storing toys while keeping the room looking tidy.
- Above the Bed: If space is limited, consider installing the toy net above the bed. This not only keeps toys within easy reach but also adds a cozy, canopy-like feel to the bed area.
- Along the Wall: For larger toy collections, you might want to hang the net along a section of the wall. This provides ample storage space while creating a decorative feature in the room.
Hanging the Net
Once you’ve chosen the perfect spot, it’s time to hang the macramé toy net. Follow these step-by-step instructions to ensure it’s secure and safe:
- Mark the Spots: Use a pencil to mark the locations where you’ll install the hooks or wall anchors. These should be evenly spaced to support the weight of the toys and prevent the net from sagging too much.
- Install the Hooks or Anchors: Depending on the wall material, choose appropriate hooks or wall anchors. Drill pilot holes if necessary, then screw in the hooks or anchors securely.
- Attach the Net: Once the hooks are in place, hang the toy net by looping the top of the net onto the hooks. Make sure the net is evenly distributed and hangs at the desired height.
- Adjust for Tension: If the net appears too loose or too tight, adjust the tension by moving the hooks slightly or adjusting the knots. The net should be tight enough to hold toys securely but with a slight sag for easy access.
Safety Tips
Safety is paramount when installing a macramé toy net, especially in a child’s room. Here are some important safety considerations:
- Out of Reach of Young Children: Ensure that the net is hung high enough so that very young children cannot reach it, especially if it’s holding heavy or hard toys that could cause injury if they fall.
- Secure Fastening: Double-check that all hooks, anchors, and knots are securely fastened. The net must be able to hold the weight of the toys without any risk of falling.
- Avoid Overloading: Do not overload the net with too many or too heavy toys. This could cause the net to sag excessively or even break. Regularly check the net for any signs of wear and tear.
By carefully installing the macramé toy net in the right spot and following these safety tips, you can create a practical and attractive storage solution that enhances the look and functionality of your child’s room.
Creative Ideas for Using Macramé Toy Nets
A macramé toy net is not just a practical storage solution; it’s also a versatile and customizable piece of décor that can enhance the aesthetic of any kid’s room. Here are some creative ideas to personalize and maximize the use of your macramé toy net.
Customization Tips
One of the best aspects of making a macramé toy net is the ability to customize it to match your child’s room. Here are some ideas to get you started:
- Different Colors: Instead of sticking to a single color, consider using ropes in different shades that complement the room’s color scheme. You could even use a gradient effect or alternate colors for a more dynamic look.
- Patterns: Incorporate different macramé patterns within the net to add texture and visual interest. For example, you could create a chevron or diamond pattern using various knotting techniques.
- Embellishments: Add decorative elements like tassels, beads, or wooden rings to the ends of the ropes. These little touches can make the toy net more playful and visually appealing, perfectly suited to a child’s room.
Other Uses
Beyond just holding toys, macramé nets can be repurposed in various creative ways throughout a kid’s room:
- Stuffed Animals: Use the net as a hammock for stuffed animals. This keeps them off the floor and creates a fun, zoo-like display on the wall.
- Book Storage: If your child has a collection of lightweight books, the net can serve as an unconventional bookshelf. Just make sure it’s hung securely and the net is tight enough to hold the books upright.
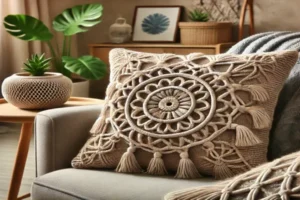
- Wall Décor: If you have extra netting material, consider using it as a purely decorative element. You could create a smaller macramé piece to hang on the wall as art, or use the net to display photos, postcards, or drawings.
Inspirational Examples
To spark your creativity, here are a few examples of how others have used macramé toy nets in unique and stylish ways:
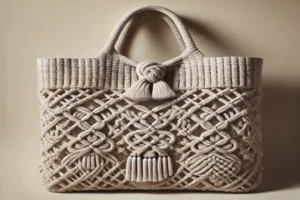
- Boho Chic Toy Net: A neutral-colored macramé net with tassels and wooden beads, hung in the corner of a room with earthy tones and bohemian décor.
- Colorful Playroom Addition: A brightly colored macramé net, made from ropes in various shades of blue and green, holding stuffed animals above a play mat in a nautical-themed room.
- Minimalist Style: A simple white macramé net used to store soft toys, hung against a pale gray wall in a minimalist, Scandinavian-inspired room.
These examples showcase the versatility and beauty of macramé toy nets, inspiring you to create something that not only serves a practical purpose but also enhances the overall design of your child’s room.
Conclusion
Creating a macramé toy net for your child’s room offers numerous benefits that go beyond simple storage. Not only does it provide a functional solution for organizing toys and decluttering the space, but it also adds a handcrafted, aesthetic element that enhances the room’s overall design. The versatility of a macramé toy net allows it to fit seamlessly into various décor styles, from boho chic to minimalist, making it a perfect addition to any kid’s room.
This project is both rewarding and accessible, even for those new to macramé. The satisfaction of creating something beautiful and practical with your own hands is unmatched. We encourage you to try making your own macramé toy net and experiment with different designs, colors, and patterns. Don’t forget to share your creations with others—it’s a great way to inspire and connect with fellow DIY enthusiasts.
If you enjoyed this project, be sure to explore other macramé tutorials and DIY ideas on our blog. Whether you’re looking to make wall hangings, plant holders, or other creative crafts, we have plenty of projects to keep your creativity flowing. Don’t forget to sign up for our newsletter to stay updated on the latest DIY ideas, tips, and inspiration straight to your inbox. Happy crafting!


